

Integrating AI-powered color sorting into your stone production line is straightforward with the right image capture process. This guide explains two proven methods for capturing tile images and the complete workflow from image capture to physical sorting.
Transform your production line in just 2 simple manual steps.
Image Capture Methods
You have two reliable options for capturing tile images from your production line. Choose the method that best fits your budget, workspace, and production volume.
Option 1: Digital Camera Method
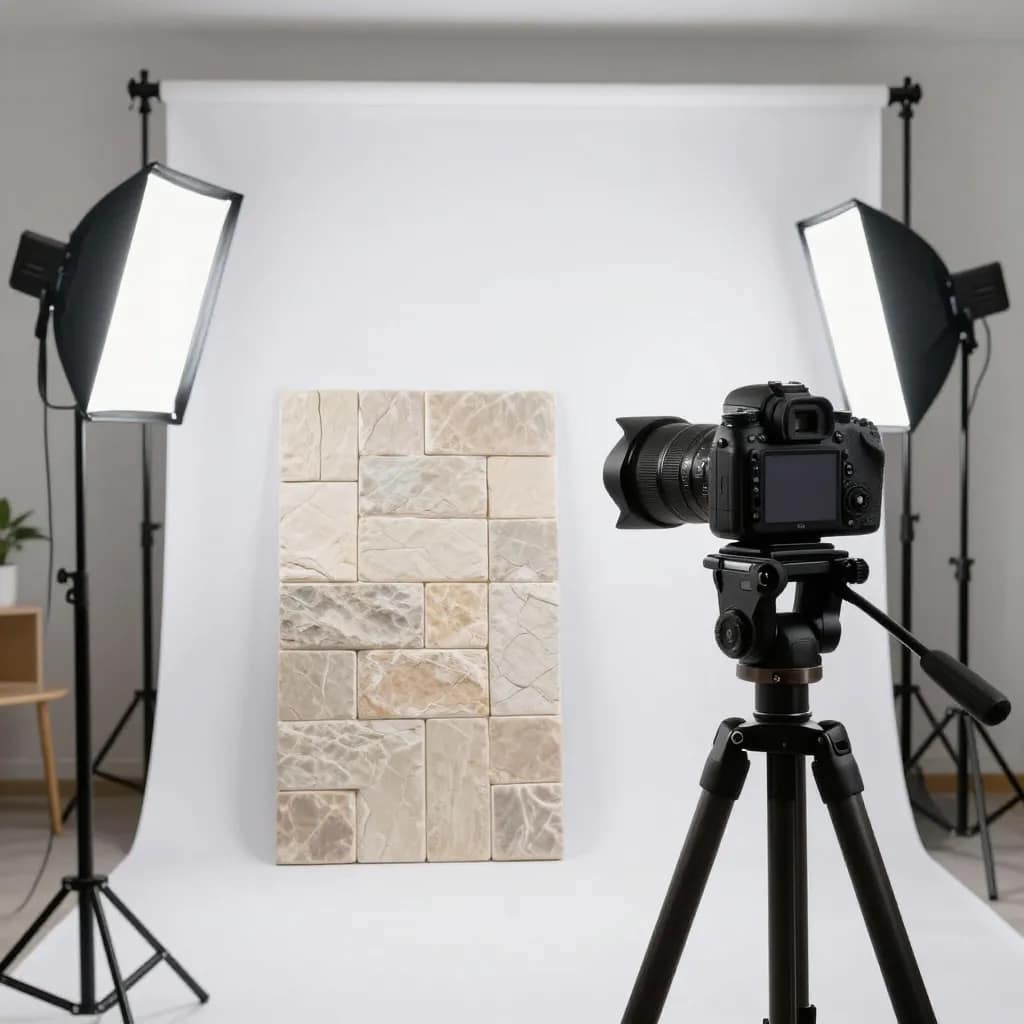
Equipment Required:
- Digital camera (smartphone cameras work well for most applications)
- Consistent lighting setup (LED panels or natural daylight setup)
- Stable camera mount or tripod
- Clean, neutral background (white or light gray recommended)
Setup Instructions:
1. Create a Consistent Environment
- Set up your photography area in a location with stable lighting conditions
- Use white or light gray backdrop to ensure accurate color representation
- Position lighting at 45-degree angles to minimize shadows and glare
- Avoid direct sunlight or mixed lighting sources
2. Camera Positioning
- Mount camera at a fixed height above the tile (approximately 60-80 cm)
- Ensure camera remains at the same angle and distance for every shot
- Keep camera parallel to the tile surface to avoid perspective distortion
3. Lighting Setup
- Use consistent white balance settings (5500K daylight recommended)
- Ensure even lighting across the entire tile surface
- Test your setup with sample tiles to verify color accuracy
- Avoid harsh shadows or bright spots
4. Capture Process
- Place each tile on the backdrop in the same position
- Ensure the tile fills most of the frame while maintaining consistent framing
- Take one clear, focused image per tile
- Review images immediately to ensure quality
Pros:
- Flexible for different tile sizes
- Can capture large format tiles easily
- Initial setup is straightforward
Cons:
- Requires careful attention to consistent lighting
- Environmental changes can affect results
- Higher risk of color variation
Option 2: Document Scanner Method ⭐ RECOMMENDED
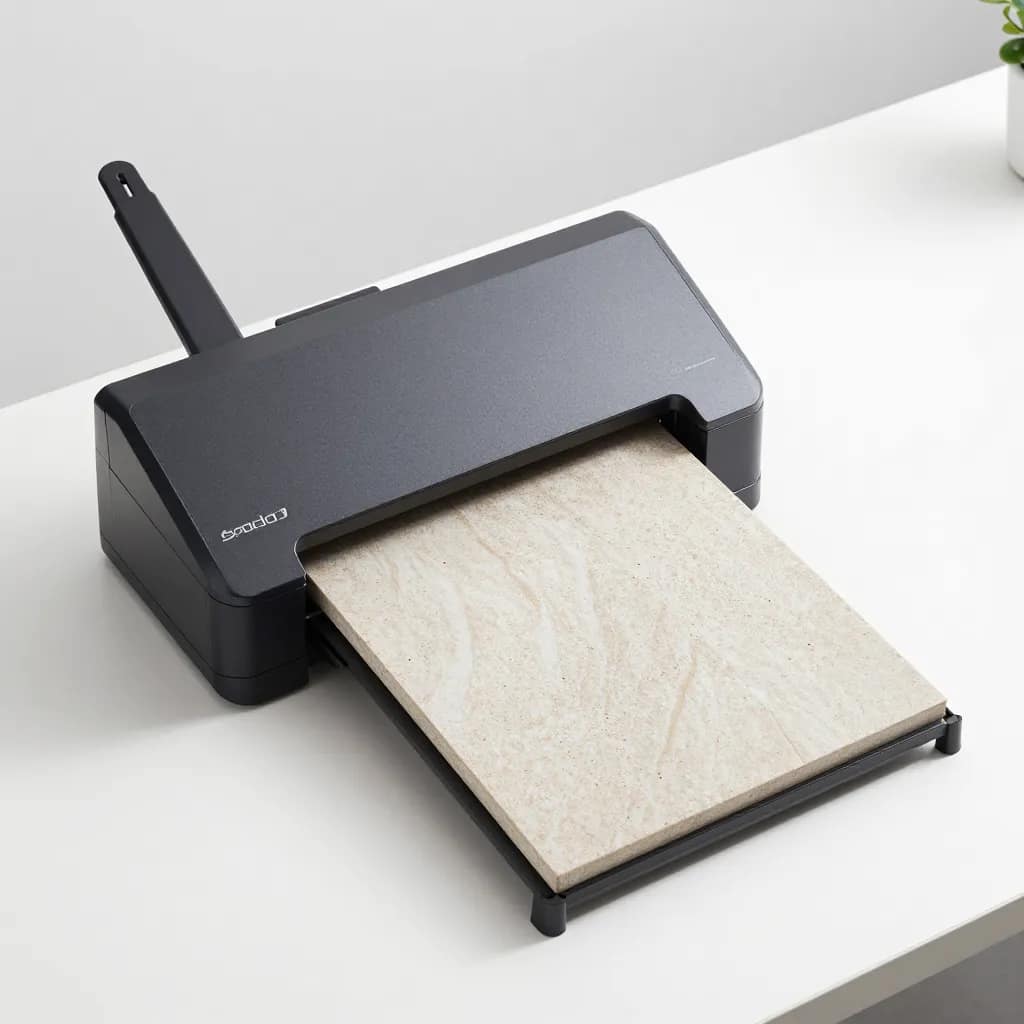
Equipment Required:
- Standard A4 size document scanner (flatbed scanner)
- No additional equipment needed
Setup Instructions:
1. Scanner Setup
- Use any standard flatbed A4 document scanner
- Set scanner to highest quality settings (300 DPI minimum recommended)
- Configure color mode to RGB color
- Disable any auto-enhancement or color correction features
2. Scanning Process
- Place each tile face-down on the scanner glass
- Ensure tile is positioned consistently in the same area
- Close scanner lid to ensure even lighting
- Scan each tile and save with a unique filename
3. File Management
- Save scans in JPG or PNG format
- Use sequential or systematic naming (e.g., TILE001, TILE002, etc.)
- Store all scans in a dedicated folder
Why Scanner Method is Recommended:
- ✅ Guaranteed consistent lighting – Scanner provides uniform illumination every time
- ✅ No costly setup required – Use existing office equipment
- ✅ Eliminates environmental variables – No concerns about ambient light
- ✅ Better color accuracy – Controlled light source
- ✅ Repeatability – Same results every time
- ✅ Cost-effective – No camera or lighting equipment needed
Complete Workflow: From Image to Sorted Lot
The 5-Step Process
- Mark Tiles – Write image names on tile backsides
- Organize Images – Save all images in dedicated folders
- Upload to AI – Let the PHP Color Sorter analyze images
- Download CSV – Get your sorting instructions
- Physical Sort – Match tiles to CSV categories
Step 1: Mark Tiles During Image Capture
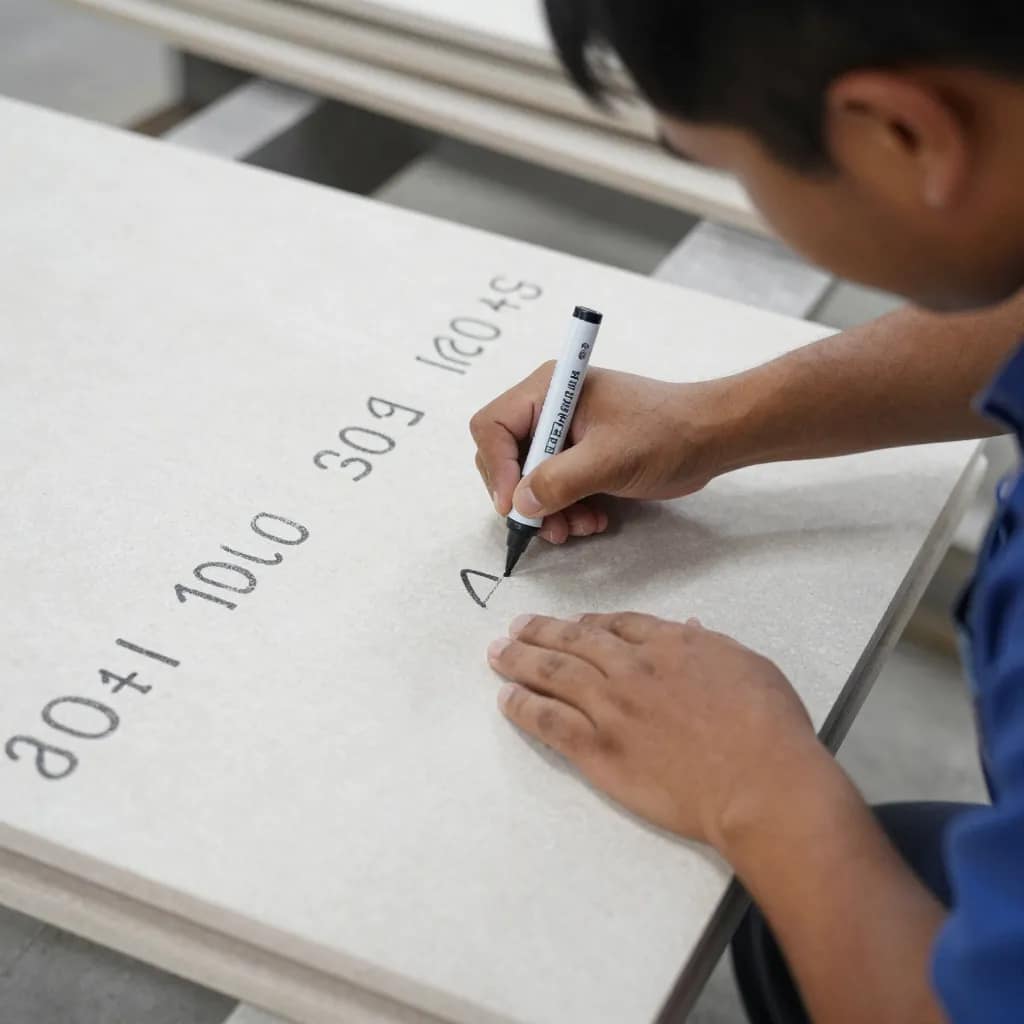
CRITICAL STEP – DO NOT SKIP!
As you capture each image (camera or scanner), immediately mark the corresponding tile on its backside with the image filename.
Marking Instructions:
- Use permanent marker or chalk marker
- Write clearly and legibly
- Mark on the back/underside of the tile where it won’t affect the finish
- Use the exact image filename (e.g., if image is “TILE001.jpg”, write “TILE001”)
- Double-check that marking matches the filename before moving to next tile
Step 2: Organize and Save Images
- Create a Dedicated Folder – Create a new folder for each production lot with clear naming
- Save All Images in One Location – Keep all images from the same lot together with unique filenames
- Quick Quality Check – Review sample images to ensure clarity and consistency
Step 3: Upload to PHP Color Sorter Interface
- Access the application through your web browser
- Upload your images by clicking “Pick files” or drag and drop
- Start AI processing – typically takes 1-2 seconds per image
- Review sorted results organized by color categories
Step 4: Download the CSV Sorting File

The CSV file contains three columns:
Image_Name,Category,Confidence
TILE001.jpg,Light Mint,98.5%
TILE002.jpg,Medium Mint,97.2%
TILE003.jpg,Light Mint,99.1%
TILE004.jpg,Dark Mint,96.8%
Open the CSV in Excel or Google Sheets and use it as your sorting reference.
Step 5: Physical Sorting Based on CSV

Simple Sorting Process:
- Create separate physical areas for each category
- Take each tile and check the marking on its backside
- Find that image name in your CSV file
- Place the tile in the corresponding category area
- No visual judgment required! – Workers simply match numbers to categories
The Two Manual Tasks Required
The beauty of this system is its simplicity. Only two manual tasks are needed:
Task 1: Mark Tiles
- Who: Any worker
- Skill: Basic literacy
- Time: 5-10 seconds/tile
- When: During capture
Task 2: Sort by CSV
- Who: Any worker
- Skill: Basic literacy
- Time: 10-15 seconds/tile
- When: After CSV download
No color expertise required. No subjective judgments. No expensive training.
Benefits Summary
| Traditional Manual Sorting | AI-Assisted Sorting |
|---|---|
| 8 hours for 500 tiles | 1-2 hours for 500 tiles |
| 85-90% accuracy | 99.5% accuracy |
| Requires expert sorter | Any worker with basic literacy |
| Inconsistent results | Identical results every time |
Key Advantages:
- ✅ 75-85% time savings – What took 8 hours now takes 1-2 hours
- ✅ 99.5% accuracy – Consistent, reliable results every batch
- ✅ Cost reduction – Handle 5x more orders without additional staff
- ✅ Easy scalability – Simple training, unlimited processing
- ✅ Complete traceability – Digital records for quality audits
- ✅ Reduced returns – Improved customer satisfaction
Tips for Best Results
- Maintain Consistency – Use the same capture method throughout each lot
- Quality Matters – Ensure images are in focus with adequate resolution (min 1200×1200 pixels)
- Mark Accurately – Take extra time to mark clearly and verify before moving on
- Organize Workflow – Process tiles in manageable batches of 50-100
- Train Your Team – Demonstrate processes and practice with small batches first
- Keep Records – Save CSV files and maintain image archives for audits
Conclusion
By implementing this simple two-step manual process—marking tiles and sorting by CSV—you transform the traditionally complex and error-prone task of color sorting into a straightforward operation that any worker can perform accurately.
Ready to Revolutionize Your Production Line?
Start with a small test batch, experience the accuracy and speed firsthand, and watch your efficiency soar.
For technical support, custom setup assistance, or questions about implementing this workflow in your production facility, contact the ASToneTech support team at info@astonetech.com